| |
1. BlueSoleil cPhoneTool Introduction
BlueSoleil cPhoneTool is a plug-in designed for BlueSoleil, which is used for managing the contacts and messages on your mobile phone. Additionally, BlueSoleil cPhoneTool also allows you to make phone calls, send and receive messages on your computer. In this new version of BlueSoleil cPhoneTool, two more functions are newly included: File Transfer and Dial-up Networking, bringing more BlueSoleil experience to you.
2. Welcome
2.1 Select / Switch a mobile phone
1. Select a mobile phone
Steps: 1.Start BlueSoleil cPhoneTool and come to cPhoneTool main window.
2. Make your phone discoverable;
3. Select "Other Devices" from the drop-down menu on the title bar or click "Select phone" in the Contact page. Then click "Search Devices" and wait for a little while until the target phone is discovered.
4. Select the target phone from the searching result. (Figure 1)

Figure 1
2. Switch the phones from the historical connection record: You could choose the historical connected phones from the drop-down menu, since the phones which have been connected with BlueSoleil cPhoneTool will be recorded in this menu. (Figure 2)
Note: Current connection will be disconnected when you switch to another phone.
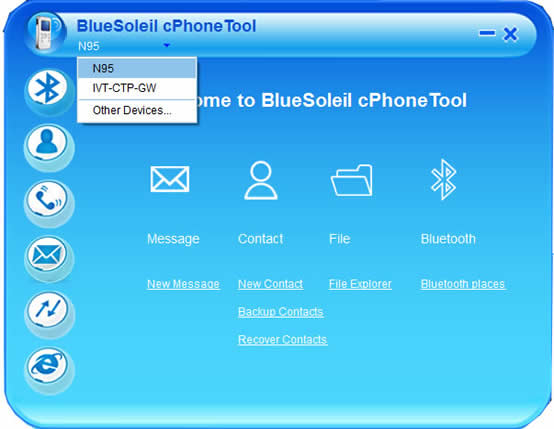
Figure 2
2.2 Welcome Main Window
As shown in Figure 3, in this page you can:
· Click the application icons on the left side of the main window
· Click the function icons in the middle of the main window
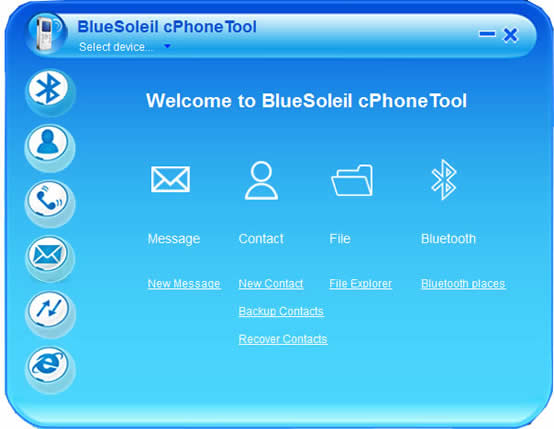
Figure 3
3. New Options
Select iSend/aLock function.
Steps:Menu->tool->option->advance
A dialog box will popup as follow:
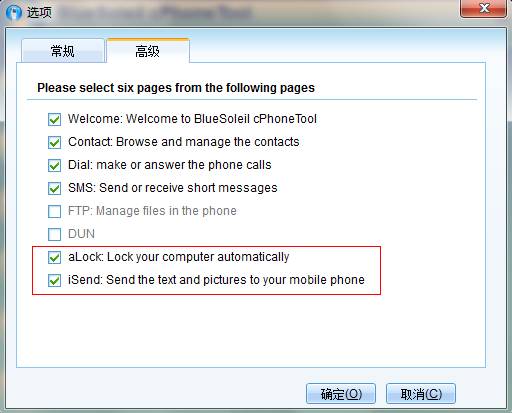
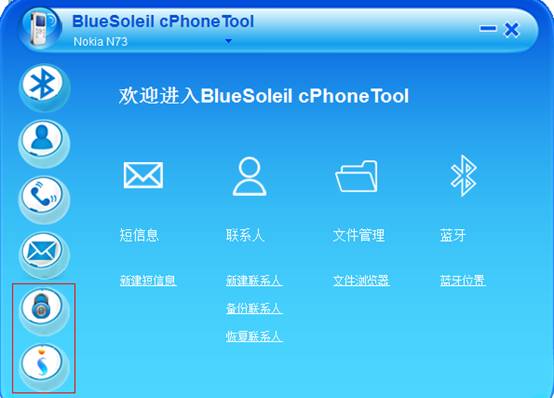
Check aLock’s or iSend’s check box, and then you can see the icons of aLock or iSend on the main interface:
Note: the main interface only can show 6 function icons at most. If you cannot check aLock or iSend under the path menu->tool->option->advance, please remove the functions for no use temporarily and check it again.
4. Function Guide
Welcome : To show the main functions on the main window.
Contacts : To view and manage your contact information, dial and send messages to your contacts.
Dial : To make an outgoing telephone call, and answer or reject an incoming call.
Messages : To send and receive the messages, and export the messages from your mobile phone.
File Transfer : To transfer the files or folders between the PC and the mobile phone.
Dial-Up Networking : To dial-up to the Internet via a Bluetooth mobile phone.
4.1 Contacts
This function enables users to:
- View the mobile phone's contacts
- Search the contacts
- Backup/Recover the contacts
- Edit the contacts
- Update the contacts
- Call and send the messages to your contacts
- Select other devices
Note: For the mobile phones providing PBAP service, please open this service before your contact operations.
Steps:
- Click Menu->File->Current Device Properties (Figure (1)).
- Click Model->tick Connect Bluetooth Phone Book Access Profile (PBAP) (Figure (2)).
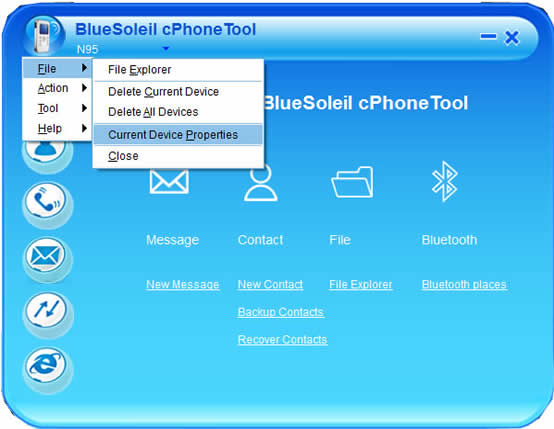
Figure (1)
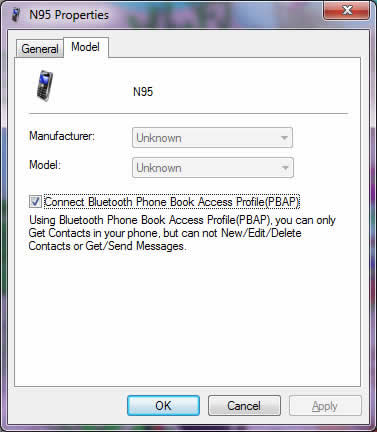
Figure (2)
Steps:
- Search your mobile phone and establish a connection between your phone and cPhoneTool.
- Click the Contacts icon. The contacts in your mobile phone will be shown in the Contacts tab.
- Search contacts: Input some relevant words in the search box (Figure 4). The contacts with the relevant words will be shown in the Contacts tab.

Figure 4
- Update: Click Update button at the bottom or click Menu->Action->Update Contacts. (Figure 5)
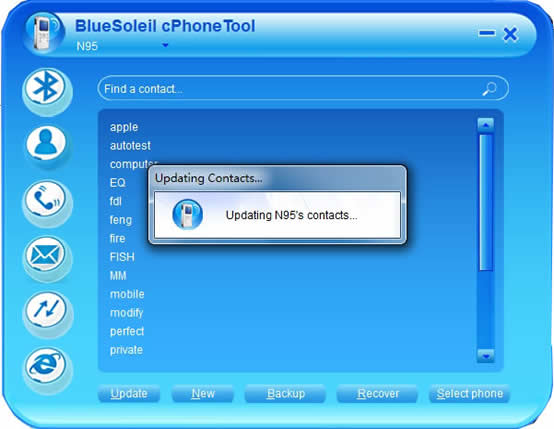
Figure 5
- Create a new Contact:
- Click the New button (Figure 6)
- Click the cPhoneTool logo icon, and select Action-> New Contact

Figure 6
- Backup/Recover your contacts: Click the Backup button. (Figure 7) A file named "contacts_(Bluetooth mobile phone name)_(date of backing up).dat" (for example: xxxx.dat) will be generated and saved in your PC. While by clicking Recover button, you can recover the contacts from a backup file.

Figure 7
- Call/Edit/Send Messages to a contact: Click a contact item to unfold, and then click the Call, Edit or Message icon on the contact item. (Figure 8)
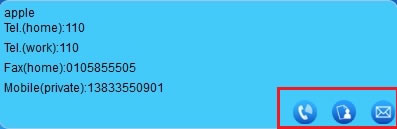
Figure 8
Note: When you click a contact to unfold it and then double-click the contact item, cPhoneTool will dial the first telephone number as default. To dial or send messages to a contact with two or more telephone numbers, you have to select one of the telephone numbers first, then click the Call or Message icon.
- Delete: Select one contact in the list. Then right-click the contact item and select Delete/Delete All to delete one contact or delete all contacts.
4.2 Dial
This function enables users to make outgoing telephone calls, and answer or reject the incoming calls on the PC side. To make an outgoing telephone call, you can input the telephone number in the Dial tab, or just click the call icon on the contact or call history item.
Steps:
- Search your mobile phone, and establish a connection between your phone and cPhoneTool.
- Dial to call: Click the Dial icon, and click the number buttons to input telephone number, then click Call button. If you input a wrong number, click the Backspace button to delete it. (Figure 9)
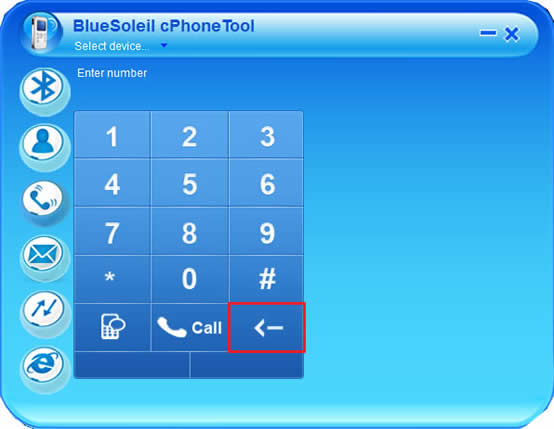
Figure 9
- View call history: To view the information of historical calls including the telephone number, the call time and the duration on the right side. (Figure 10)
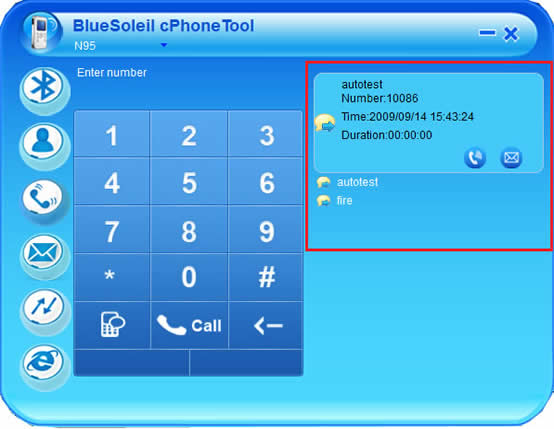
Figure 10
Note: You can dial or send the messages in the history tab: click a contact item to unfold it, and then click the Call/Message icon on the contact item.
- Answer or reject an incoming telephone call by clicking the Call button.
- Adjust the volume: During the call, drag the Volume button of a speaker or a microphone to adjust the volume. (Figure 11)
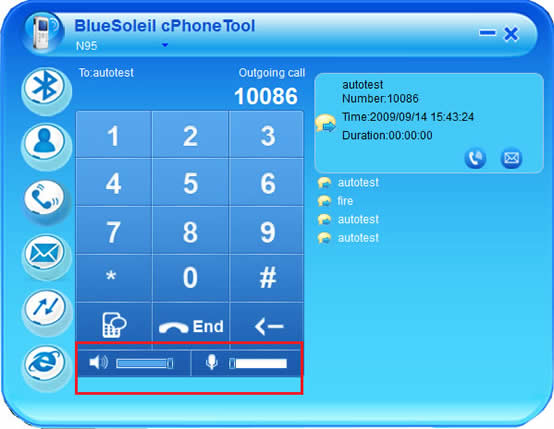
Figure 11
- To switch the voice signal from cPhoneTool to your mobile phone, click the Voice Switching button. (Figure 12).
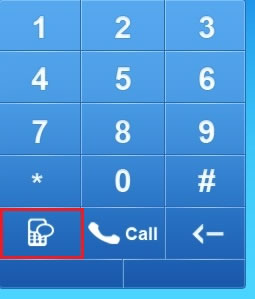
Figure 12
- Redial: The latest number you dialed will appear in the Dial tab by clicking the Dial button..
Note: Ringing tone and message alert tone are able to be changed according to users' fancy. Click the cPhoneTool logo icon, and then click Tool -> Options...in the Options dialog to browse and select the audio files in your computer. (Figure 13)
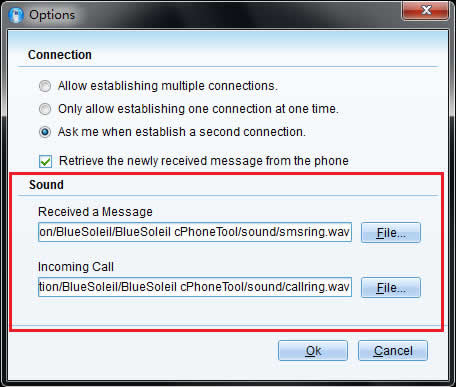
Figure 13
4.3 Message
This function enables users to send the messages, receive the new messages, and export the messages from your mobile phone. This new version of cPhoneTool supports group SMS.
- Update: Click the Update button to update the list. Message list is arranged alphabetically based on the name of the senders/recipients. (Figure 14)
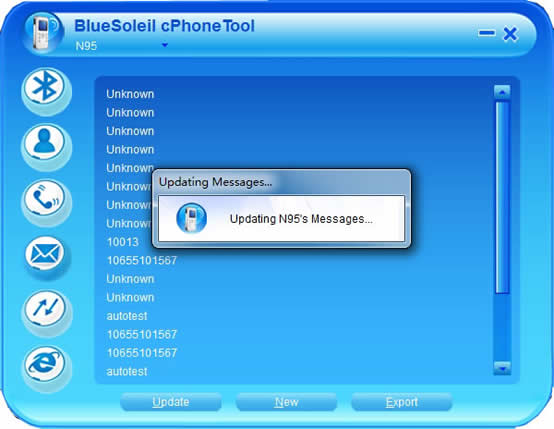
Figure 14
- New: Click the New button and a Contact list box will pop up. You can select one or more contacts to send the messages. Also, you can add other telephone numbers to the sending list. (Figure 15)
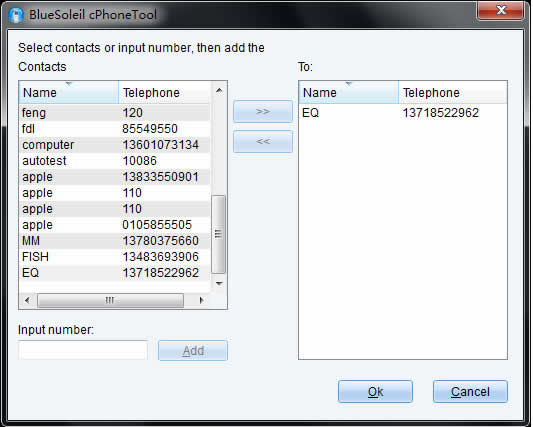
Figure 15
A chatting window shows up when you click the OK button after adding the telephone numbers. (Figure 16) Write down the message and send it.

Figure 16
- Export messages: Click Export or click Menu -> Action -> Export Messages. The exported documents will be saved in .xml format.
- Receive new messages from mobile phone. To retrieve the newly received message from the mobile phone in the chatting window, please click the cPhoneTool logo icon, then click Tool->Options..., and select the check box saying Retrieve the newly received message from the phone. (Figure 17)
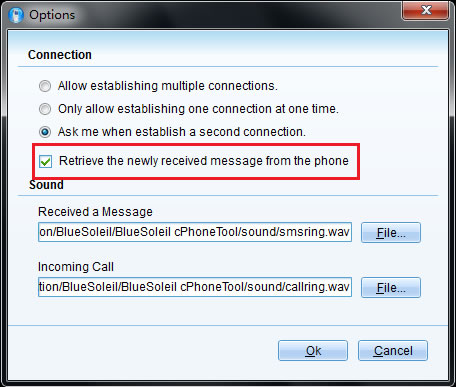
Figure 17
4.4 File Explorer
This function enables users to access the folders shared by a mobile phone. (Figure 18)
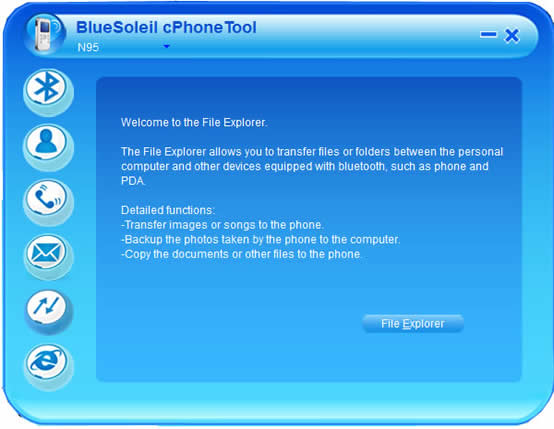
Figure 18
Click File Explorer or click cPhoneTool Logo -> File -> File Explorer, then you can transfer the files or folders between your computer and other devices.
Note: This function allows you to transfer the images or songs to the phone. And you can remotely manage the documents on the phone by File Explorer.
4.5 Dial-Up Networking
This function enables users to dial-up to the Internet via a Bluetooth mobile phone.
- Connect: After setting all the options, click the Connect button to establish a dial-up network connection. (Figure 19)

Figure 19
- Disconnect: Click the Disconnect button to disconnect the current dial-up connection. (Figure 20)
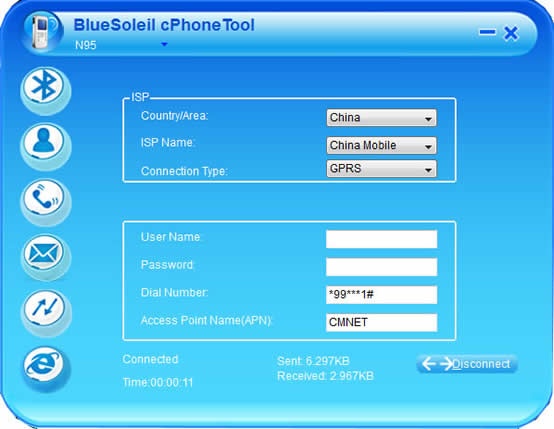
Figure 20
4.6 aLock
This feature is designed to provide users with a higher security. When the connected mobile phone is away from PC for a designated distance, your PC will automatically be locked, and others can not use your PC.
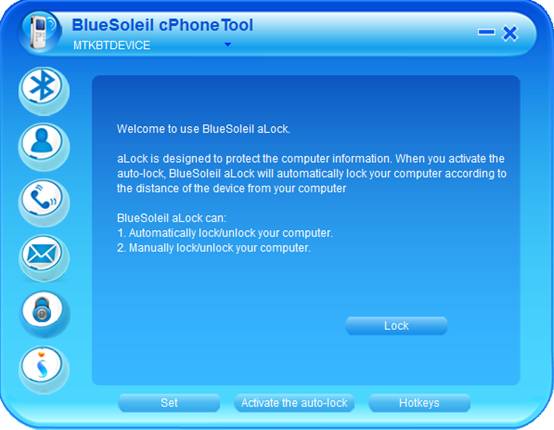
Steps:
- Search your mobile phone and connect it with cPhoneTool2
2.Set:Click to popup the dialog box below: to popup the dialog box below:
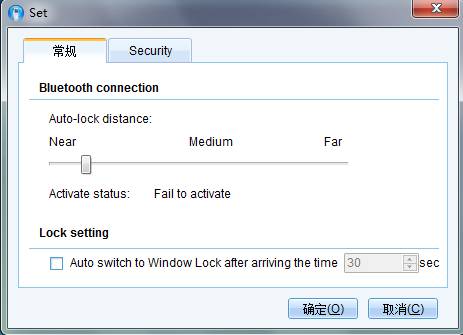
On the General page, you can set the auto-lock distance, and choose to activate Window Lock.
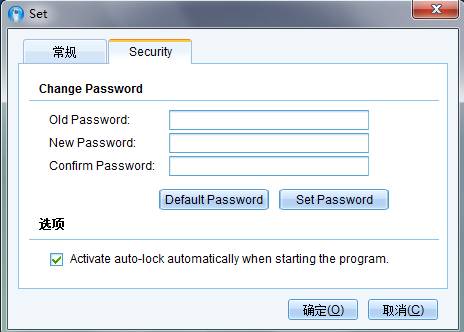
On the Security page, you can set unlock password. If you forgot the current password, you can click Default Password to reset the password as “bluesoleil”. In addition, you can activate auto-lock automatically after starting cPhoneTool2.
3. Activate auto-lock:Click , and then it will turn to , and then it will turn to  . When the connected mobile phone is away from PC for a designated distance, your PC will automatically be locked, and when the phone is near the PC, the PC will automatically be unlocked. You can set the distance. Click . When the connected mobile phone is away from PC for a designated distance, your PC will automatically be locked, and when the phone is near the PC, the PC will automatically be unlocked. You can set the distance. Click  , and the button will turn back to , and the button will turn back to  . At this moment, auto-lock is closed. When the connected mobile phone is away from PC, the PC will be unlocked. . At this moment, auto-lock is closed. When the connected mobile phone is away from PC, the PC will be unlocked.
4.Set Hotkey:Click  to popup a dialog box: to popup a dialog box:
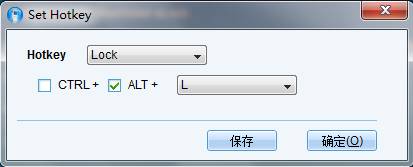
You can define aLock's hotkeys depending on your favors.
5. Manual Lock:Click  , and the PC will be locked.As shown below: , and the PC will be locked.As shown below:

Enter the password in the input box, and click “Unlock” to unlock. And you can click “Lock Windows” button entering the Windows login interface to unlock using the login password.
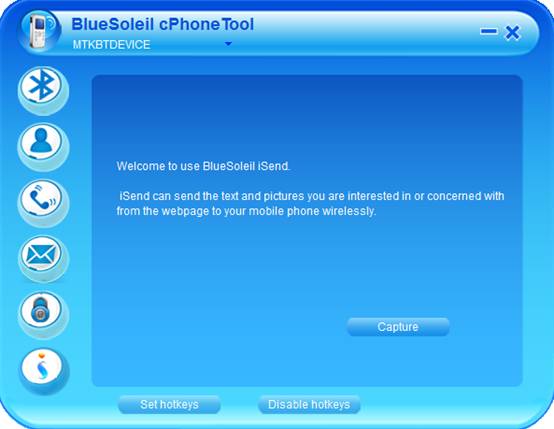
4.7 iSend
Using this function, you can make screen captures and choose the text and pictures from the webs, and send them to your mobile phone by Bluetooth.
Steps:
1. Search your mobile phone and connect it with cPhoneTool2.
2. Screen capture:
2.1 Click  , and the “Screen Capture” information will be shown at the top left corner on the screen. You also can open “Screen Capture” function by using the hotkeys. , and the “Screen Capture” information will be shown at the top left corner on the screen. You also can open “Screen Capture” function by using the hotkeys.
2.2 Hold down the left mouse button and drag the mouse to select the picture you want to capture.
2.3 Release the left mouse button, and select the appropriate size.
2.4 Double-click the left mouse button on your selected the picture area, and the “Preview Picture” dialog box will pop up.
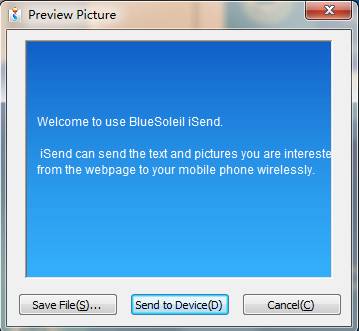
2.5 There are three buttons in the “Preview Picture” dialog box:
(1)Save File(S): Choose to save the path and the file formats, such as jpg or bmp, and the default format is jpg.
(2)Send to Device(D):Under BlueSoleil and BroCom protocol stacks, click “Send to Device” button, and then you can send your selected pictures to your mobile phone. Under Windows protocol stack, click “Send to Device” button, and a prompt dialog box will pop up which records the path saving the screen capture and the file name. Click to send, and then you need to select the mobile phone again and then select the information according to the prompt dialog box. Finally, click “Next” to send the picture to your mobile phone.
3 Send the texts and pictures from the web:
3.1 Open the webpage(through IE or Firefox browser);
3.2 Select the picture or text and right-click the mouse. Select “Send by Bluetooth” on the menu popped, and then the send dialog box will pop up:
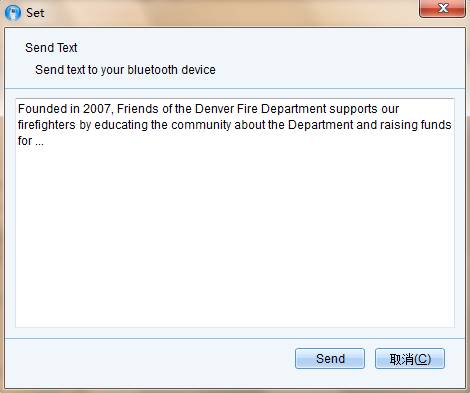
Sending words
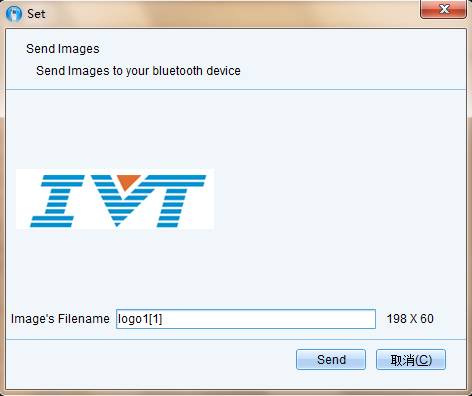
Sending pictures
3.3 Under the BlueSoleil and BroCom protocol stack, click the Send button to send them to your mobile phone. Under the Windows protocol stack,click the “Send” button, and then a prompt dialog box will popup which records the path saving the screen capture and the file name. Click to send, and then you need to select the mobile phone again and then select the information according to the prompt dialog box. Finally, click “Next” to send the picture to your mobile phone.
4. Set Hotkey:Click  , an a dialog box will shown as follow: , an a dialog box will shown as follow:
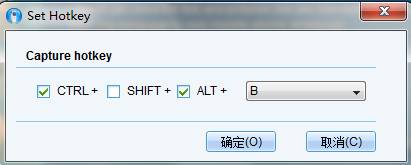
You can define the iSend’s hotkeys depending on your favors.
5. Shield Hotkey:Click  , and it will turn to , and it will turn to  . At this moment, the hotkeys will be disabled until you click . At this moment, the hotkeys will be disabled until you click  . .
4.8 Functions Classification
1.Brocom Protocol Stack
1.1Brocom 5.x
(1)Contacts Management
(2)Quick Call from Computer
(3)SMS chat and Messages management
(4)DUN;
(5)FTP;
(6)iSend;
(7)aLock。
1.2Brocom 6.x
(1)Contacts Management;
(2)SMS chat and Messages management;
(3)DUN;
(4)FTP;
(5)iSend;
(6)aLock。
2. Windows Protocol Stack
(1)Contacts Management;
(2)SMS chat and Messages management;
(3)DUN;
(4)iSend;
4.9 Notification Area Icon
When cPhoneTool starts up, the cPhoneTool icon appears in the notification area.
Steps:
- Double-click the cPhoneTool icon to open cPhoneTool's main window
- Right-click the cPhoneTool icon to show the popup menu.
Popup-menu:
- Open Main Window: Show the Main Window of cPhoneTool.
- Send Message: Show the SMS Editor dialog. Messages could be sent to the telephone numbers designated by the user.
Notice: The new version of cPhoneTool supports group SMS.
- Quit: Close and exit the cPhoneTool program.
4.10 Others
Delete Current/All Devices: Click the cPhoneTool logo icon, and select File -> Delete Current Device/Delete All Devices to clear the connection histories.
- Close cPhoneTool main window: Click the cPhoneTool logo icon, and select File -> Close.
- Help menu: Click the cPhoneTool logo icon, and select Help. The Help menu of cPhoneTool contains the following items:
- Online Help: Display cPhoneTool help document.
- Check for Update: Access BlueSoleil website to check if any updates is available.
- Buy...: Open the BlueSoleil online store page to buy the full product for the current version.
- Activate...: Input the serial number to activate BlueSoleil cPhoneTool through Internet.
- About...: Information about your version of cPhoneTool.
|

